-
Welcome to Registry Reviver
Registry Reviver is trusted by millions of users world-wide to help keep their PC in tip-top shape. While there are many features and benefits of Registry Reviver, we’d like to share with you a short top 5 list of what we think you need to know about Registry Reviver.
Top 5 things to know01.Customize Your ScanClick the Scan (magnifying glass) icon. You can determine which areas of your Windows registry will be scanned for errors. Notice that Deep Scan is deselected by default. Try selecting it, and you’ll get a much more thorough scan, though it will take longer.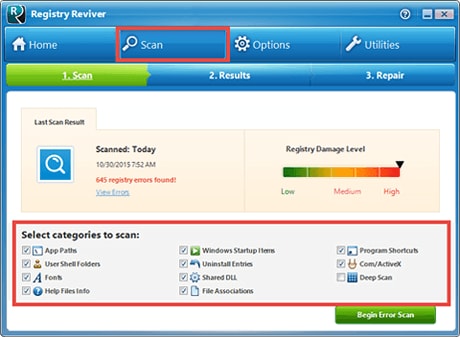
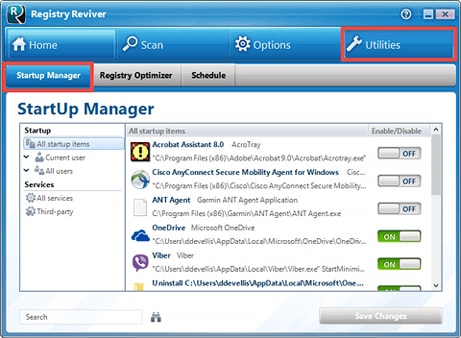 02.Startup ManagerClick the Utilities (wrench) icon. Then, click the Startup Manager tab. You’ll notice numerous Windows startup programs that you can deselect, if you definitely don’t want those programs to start up when Windows does. Click Save Changes and restart your PC for a startup speed boost!03.Registry OptimizerClick the Utilities (wrench) icon. Click the Registry Optimizer tab. Click the Optimize Now button, which will optimize and defrag your Windows registry. This is a great occasional step to run in between scans.
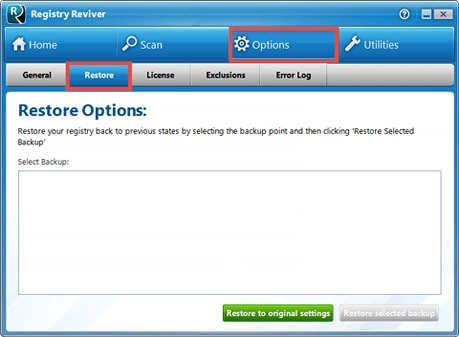
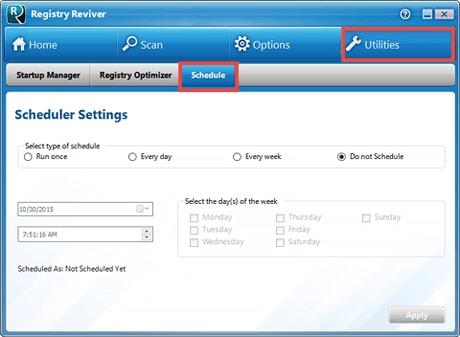 04.SchedulerClick the Utilities (wrench) icon. Click the Schedule tab. Choose whether you want to run the scheduled scan once, every day, every week, or not at all. Then, choose a date and time, or a day of the week, then click Apply to set up your scheduled scan.05.Restore Deleted EntriesClick the Options (gear) icon. Click the Restore tab. If you’re running into issues and there are any Partial Backups listed, you can click one of them and click Restore Selected Backup. This will bring your Windows Registry back to its previous state. You can also click Restore to Original Settings to bring your registry back to the state before the first time you optimized your registry.