-
-
products
-
resources
-
support
-
company
-
How to Disable WiFi in Windows
By Steve Horton July 24, 2012battery optimizer, laptop, wi-fiNo CommentsLearn how to Disable Wifi in Windows
If you’re got your laptop connected to the Internet through a cable (called Ethernet), or through mobile Internet (3G or 4G), then it’s a good idea to disable WiFi (i.e your Wireless Network adapter) completely. Not only will this save you a lot of battery life, but it will also enable your PC to start up faster and limit your exposure to a network attack.
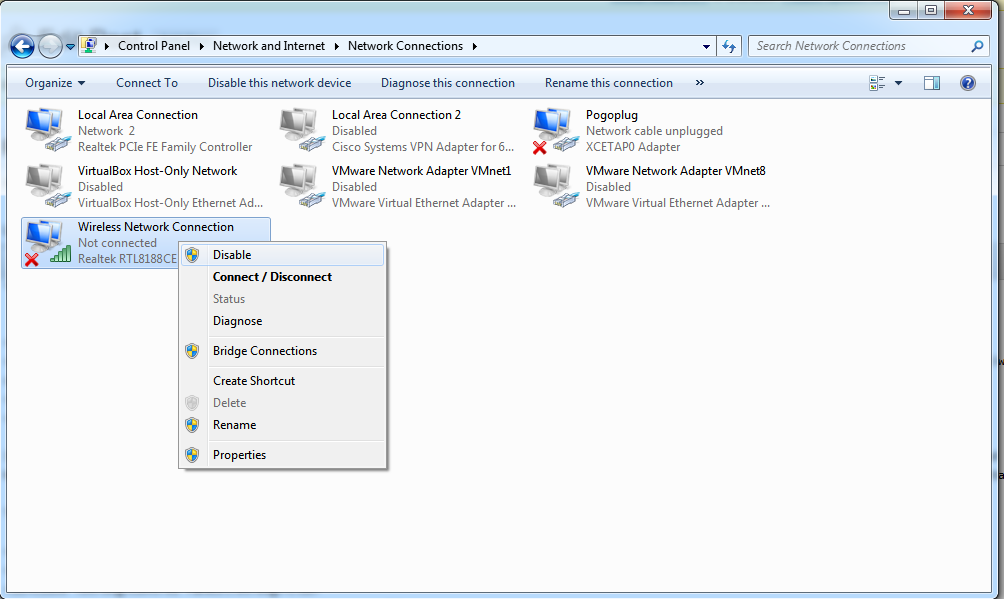
To disable the Wi-Fi adapter:
- Click Start
- Click Control Panel
- Click Network and Sharing Center
- Click Change Adapter Settings
- Right click on Wireless Network Connection
- Select Disable
To re-enable Wi-Fi, take the same steps, and click Enable at the end.
FYI: The above steps, and many more optimizations, can also be performed automatically with our free application, Battery Optimizer. Give it a try!
Was this post helpful?YesNoFree Driver Updates
Update your drivers in less than 2 minutes to enjoy better PC performance - Free.
Free Driver Updates
Update your drivers in less than 2 minutes to enjoy better
PC performance - Free.
Didn't find your answer?Ask a question to our community of experts from around the world and receive an answer in no time at all.most relevant recent articles Pin It on Pinterest

